
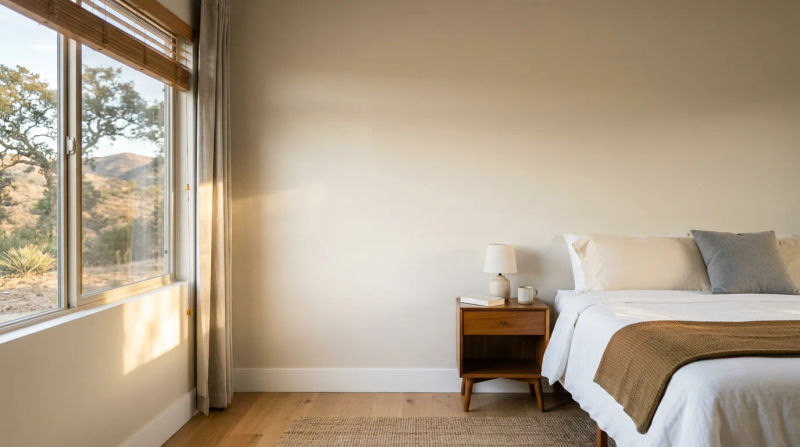
As a specialist with Drywall & Restoration LLC, I’ve seen my share of DIY projects that hit a snag. It’s a common story: a homeowner gets inspired to update a room, starts removing old fixtures or shelving, and suddenly faces a wall that looks like it’s been clawed by a bear. That’s exactly the call we received from a homeowner in Jamul. They were preparing a guest room for family visiting in the fall and had removed a large, outdated wall-mounted media unit. Instead of a clean slate, they were left with large patches of shredded, torn drywall paper. In a home with high ceilings and large windows, they knew every little imperfection would be on full display, and they needed a flawless fix, fast.
This kind of paper-faced drywall damage Jamul homeowners often encounter is trickier than a simple hole or dent. The paper facing is integral to the drywall's strength and finish. When it’s torn, you can’t just spackle over it. The moisture from the joint compound will soak into the exposed gypsum and the frayed paper, causing bubbles, blisters, and a permanently visible outline. The client was worried that the repair would always look like a patch, and with the bright, direct sunlight their Jamul home gets, they were right to be concerned. They needed a professional solution that would make the damage completely disappear, and our team at Drywall & Restoration LLC was ready to deliver.
The Assessment
When I arrived at the property, I immediately understood the challenge. It was a beautiful custom home, likely built in the late 1990s, with a spacious, open-concept layout and vaulted ceilings in the great room that flowed into the area they were renovating. The guest room itself had a large picture window that flooded the space with natural light - a finisher's worst enemy if the job isn't perfect. Any inconsistency in the wall texture or paint sheen would stick out immediately.
The damage was significant. The previous fixture had been attached with numerous anchors, and removing them had peeled away sections of the drywall's top paper layer, leaving behind a fuzzy, uneven surface. The homeowner had tried to apply a little spackle, but it was already starting to bubble and looked uneven. I explained that this is a classic issue with torn drywall repair. The key isn't just to fill the area, but to properly seal and stabilize the damaged paper first.
My assessment for the homeowner involved a few key points:
- Stabilization is Essential: We couldn't proceed without first addressing the compromised paper. Any new material applied directly over it would fail.
- A Simple Patch Wouldn't Work: Due to the size of the damaged areas and the critical lighting conditions, we couldn't just do a small "spot repair." To make it truly invisible, the repair needed to be blended across a much larger section of the wall.
- Surface Uniformity for Painting: The ultimate goal was a wall that could be repainted without any "flashing" - where the repaired area shows a different texture or sheen than the rest of the wall. This required a multi-step priming and finishing process.
After walking the client through our proposed plan, they felt confident that Drywall & Restoration LLC had the expertise to restore their wall to a pristine condition, ensuring it would be perfect for their upcoming guests.
Our Solution
With the October deadline in mind, our two-person finishing crew from Drywall & Restoration LLC scheduled the project to allow for adequate drying time between each critical step. Our process is methodical because quality is paramount.
First, we prepped the area. We carefully scraped and cut away any loose, peeling paper fragments to create a solid foundation. We then lightly sanded the edges of the torn paper to taper them down, ensuring a smoother transition for our skim coat. The entire area was then thoroughly wiped down to remove all dust and debris.
The most critical step came next: sealing the damage. We applied a coat of a shellac-based sealing primer directly over the exposed gypsum and torn paper edges. This specialized primer works as a barrier, preventing the moisture in our joint compound from wicking into the wall and causing the dreaded bubbling and peeling. It’s a non-negotiable step that many DIY attempts miss.
Once the sealer was fully cured, we began the process to skim coat and repaint Jamul CA walls to perfection. Instead of a single, thick layer of mud, we applied three separate, thin skim coats of all-purpose joint compound. Here’s how we did it:
- First Coat: We applied the first thin layer with a wide 12-inch taping knife, focusing on filling the damaged areas and feathering the edges out about a foot from the repair.
- Second Coat: After the first coat dried, we lightly sanded it to knock down any high spots. The second coat was applied even wider, extending the feathered edge to about 18 inches. This gradual tapering is what makes a repair invisible.
- Final Skim Coat: The third and final coat was a very thin application of topping compound, which is finer and sands to an ultra-smooth finish. This final layer addressed any minor imperfections and created a perfectly flat, uniform plane.
Given the cooler October air, we used professional air movers to ensure consistent and thorough drying between coats. Rushing this stage is how you get cracks and shrinkage later. Our standardized process at Drywall & Restoration LLC accounts for environmental factors to guarantee a lasting result.
The Results
The transformation was exactly what the homeowner had hoped for. After the final skim coat was sanded smooth with a fine-grit paper, the wall was a single, monolithic surface. You simply could not tell where the damage had been. The meticulous before and after drywall patch Jamul difference was dramatic. What was once a scarred, uneven eyesore was now flawlessly flat and ready for paint.
To complete the job, we applied a full coat of high-quality PVA drywall primer over the entire repair area. This ensures that the new paint would absorb evenly, preventing any variation in sheen. We then repainted the wall corner to corner, providing the uniform, beautiful finish the room deserved. The bright sunlight coming through the window now only highlighted how perfect the wall looked.
The project was completed in just three days, well ahead of the homeowner's deadline for their guests' arrival. They were thrilled not only with the seamless result but also with our crew's cleanliness and professionalism. They mentioned how they could finally move forward with decorating the room without being reminded of the damage that was once there. This is the standard of quality and peace of mind we strive to provide on every Drywall & Restoration LLC project.
Conclusion
A small issue like torn drywall paper can quickly become a major visual problem, especially in a well-lit space. While it may seem like a simple fix, achieving a truly invisible repair requires technical knowledge of materials and a methodical process. This Jamul project is a perfect example of how the right techniques for sealing, feathering, and finishing can completely erase damage, restoring a wall to its original state. Our team was proud to deliver a solution that met the client’s high standards and tight deadline.
If you're facing frustrating drywall damage, don't settle for a repair that you'll always be able to see. Ready for your own Drywall & Restoration LLC experience? Contact us today for a free inspection.